Reverse Stringer Staircase
- Autumn Routier

- Mar 16
- 1 min read
This custom staircase project has been a great one to see evolve step by step.
Early on, the reverse stringer detail was already starting to take shape. This stage is all about precision. Every cut, angle, and connection has to be exact because this is what everything else builds off. With the plan to add custom-matched hardwood nosings, the foundation had to be perfect from the start.

As progress continued, the structure really started coming together. The reverse stringers were coming in clean, and you could start to see the full layout of the staircase. At the same time, the matching hardwood materials began getting installed, giving a clearer picture of where things were heading.

With each step (literally), the staircase moved closer to completion. The custom stair treads were carefully built and fitted, keeping everything consistent and aligned. Even before the nosings were installed, the overall design was already standing out.

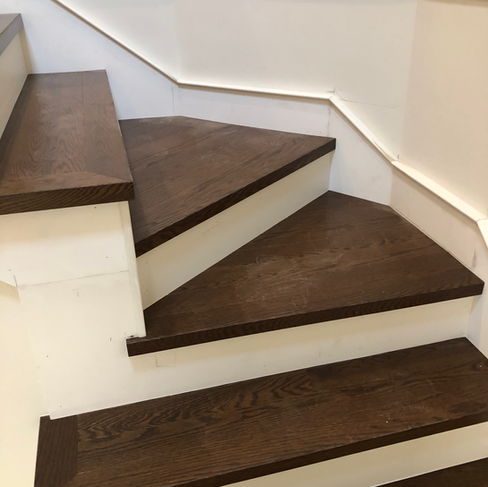
Near the final stages, everything connected up to the top floor, completing the full run of the staircase. What started as a detailed framework turned into a fully custom, stained oak feature.
And here’s where it all pays off.
The finished staircase brings everything together—clean lines, solid structure, and a custom-stained oak finish that makes it a true feature in the space. All the behind-the-scenes precision shows up in the final result, and it speaks for itself.


Thinking about adding a custom feature like this to your home? Let’s make it happen.
Get in touch today to start your project!


Comments